Wednesday, November 27, 2013

Make Your Own Bubble Bath


I used the recipes here:
http://www.realsimple.com/m/magazine-more/inside-magazine/ask-real-simple/ask-real-simple-make-own-bubble-bath-00000000014088/

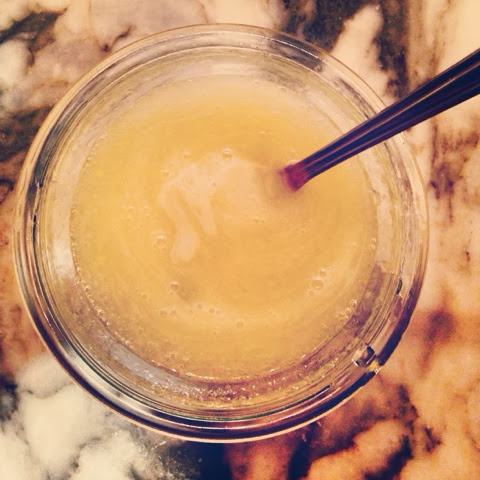
They were a starting point for me to make my own bubble bath.  Luckily I had a small travel bottle of gentle, organic liquid soap (which I had bought for the trip to Asia) which was lavender scented. I added honey, peanut oil and an egg white to make the mix.  

I added it to the running water in the bath tub.  It smelled great but there were absolutely no bubbles.  Like there were tiny bubbles for about 5 seconds and then - cricket cricket - nothing.  

The good news is the smell was great and the oil made my skin really really smooth.  Overall, I still enjoyed trying to make my own bubble bath but I would like to actually bring the bubble to life!  

Abstract Cherry Blossoms with Acrylics

1. Blank Canvass

2. Mix white, black and silver to subtlety coat canvass


3. Draw whimsical tree skeleton


4. Observe ominous warning on oil paint you won't actually use 


5-8: Paint (in thick strokes) white cherry blossoms; use modge podge to affix rhinestones to center of flowers; cut glittery leaves on cameo; generously glue leaves to picture 


9. Lay flat to dry

10. Replace unwanted wall art with abstract cherry blossoms

11. Enjoy


October Craft Night at Etsy Studio


The Etsy studio, located in Dumbo, has a free craft night once a month.  This month they had letterpressed Day of the Dead paper dolls to color (with watercolor pencils) and put together with brads.  You see my finished product above!


I wish Iived here to craft 24/7 ;)


Entrance to etsy studio!

All Star Invites


These are simple invitations I made for a perfect attendance breakfast for high school students.  I used the cameo silhouette to cut stars and used my "You're Invited" stamp from paper source - with embossing powder and a heat tool!

Wednesday, November 6, 2013

Halloween Cakes and Decorating


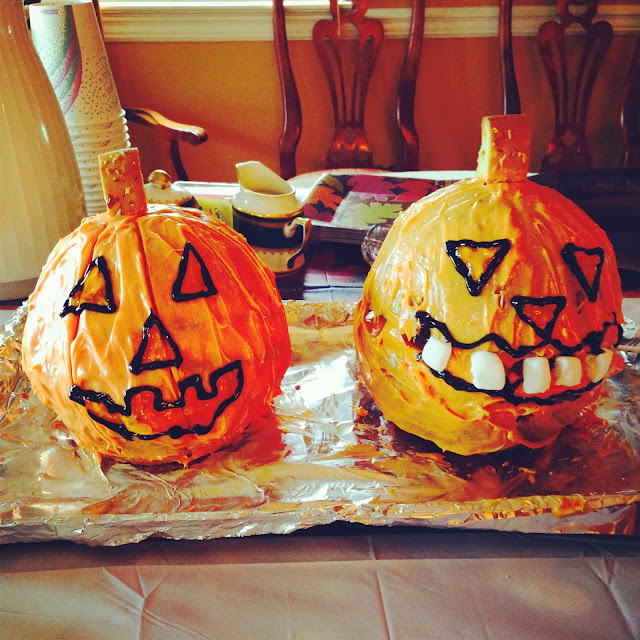
These are the first spherical cakes that I ever attempted to make.  I have to admit, this was a little stressful.  It was mainly because I didn't leave enough time to get the job done and these round cakes take longer to cook.  Next time I will read up on tips, allot myself lots of time and, perhaps, make a cake flavor that is LOVED by all - something like chocolate, perhaps?  This time I made pumpkin spice cake with cream cheese icing.  While appropriate for my family's "Pumpkinpalooza" theme, i realized that not everyone fights over pumpkin cake.  Chocolate, yes... there is fighting.  Devil's food it is next year.  Still appropriate.
 These are a medley of the carvings my family did at the Pumpkin carving contest at Pumpkinpalooza.


 This is the novel I decided to read for the Halloween season.  I'm still plowing along somewhere in the high 300's.  I'm not halfway done though.  I am, however, getting way familiar with this fabled clown.


I "found" this "find" on the Gowanus canal - the 9th Street Bridge at "Find," a used furniture store.  I like adding little pictures to my home chalk board, so I snapped a shot. 


This is just at a level beyond my artistic ability, but I saw this outside a coffee shop in the East Village - somewhere on Avenue B north of 9th street, I believe. 


This is my homemade "SPOOKY" Halloween door banner, made on the Cameo.  I got the template from the Paper Source on Smith Street in Brooklyn, though any Paper Source would supply it.  It was simple and it makes me happy when I come home.  (Yes, it's still up - I'll switch soon for the next holiday). 


Now, this is my level of artistic ability.  Note the wolf (or long haired chihuahua) howling on the bottom left.  This is on my chalk board at home in my kitchen.

Oh, how I love Halloween!!!

Dog Halloween Costumes Made on Cameo!


So I kind of love Halloween and I definitely more than kind of love my dogs - so dogs plus Halloween is like incredible fireworks display of amazing in my heart.

Since my dogs' names are T-Bone and Pork Chop, I thought it would be kind of perfect to dress the dogs up as their namesakes.  My friend is a skilled artist and drew the T-Bone and Pork Chop on my Cameo software.  From there it was a cinch to cut them out.

What was not a cinch, however, was effectively attaching the paper costumes to my chihuahuas.  I laminated the T-Bone and Pork Chop (the paper ones, not the chihuahuas) and bought velco pads to stick on to the dogs' sweaters.  The other velcro side would go on the laminated meat products and I would stick it to the dogs.  Well, this lasted about two seconds.  Pork Chop shook off her pork chop in two shakes of a chihuahua's tail.

I then had to submit myself - and the chihuahuas - to packing tape.  Don't worry, all was super humane (though it felt odd to tape things to my chihuahuas).

I was a zombie butcher for Halloween, to fit in with the entire theme.  I was the butcher and the dogs were meet - sick and sort of cute.  I didn't wear the full face of makeup to the Thompkin's Square Park Dog parade, but I did wear my apron.  Pork Chop also had a leash made out of hot dog links - which I thought was awesome.

Overall, a good time was had by all.

We are already trying to brainstorm costumes for next year - any "couples" ideas, send them along ;)

Happy (belated) Halloween!

Halloween Invites!


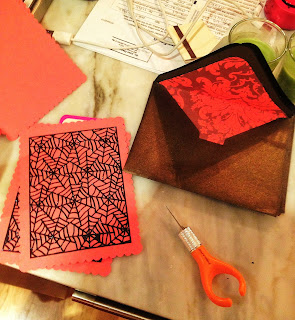
These are the invitations I made for our yearly "Martini Pumpkinpalooza," a family weekend of pumpkin picking, carving, baking, eating and partying.  Halloween is pretty much my favorite holiday so I was itching to get started on these.  So I began in - ahem - early August.

I used my cameo, washi tape, a Martini stamp, hand painted paper (for the envelopes) and glitter, obviously, for the invitations!!  The intricacy of the spider web is definitely my favorite!!